How to Choose the Right Curb Paver for Your Project?
A curb may look like a small detail, but it carries real work. It holds paving in place, guides runoff, and shapes the line people see from the street. Choosing the right Curb Paver means looking beyond color samples. Consider vehicle loads, freeze-thaw exposure, drainage, installation method, and how the edge meets nearby surfaces. A neat sample can still fail on a wet, busy site.
For this introduction, the following is an illustrative quotation, not a verified statement from a real industry expert: “Choose the curb paver for the site conditions first; let appearance refine the choice.” — Elena Ruiz, fictional paving consultant. The principle is practical. A residential garden path may need a different profile and finish than a commercial driveway with delivery traffic. Check dimensions, material specifications, and manufacturer guidance before comparing costs. Small differences matter.
This guide looks at those decisions in plain terms. It explores materials, profiles, durability, drainage, installation, and maintenance, with attention to the details that often get missed. A little uncertainty belongs here: soil conditions and workmanship can change how a product performs. Ask for project-specific advice, and review the site before ordering. A curb should fit the ground, not just the drawing.
Identify the Project’s Functional and Design Requirements
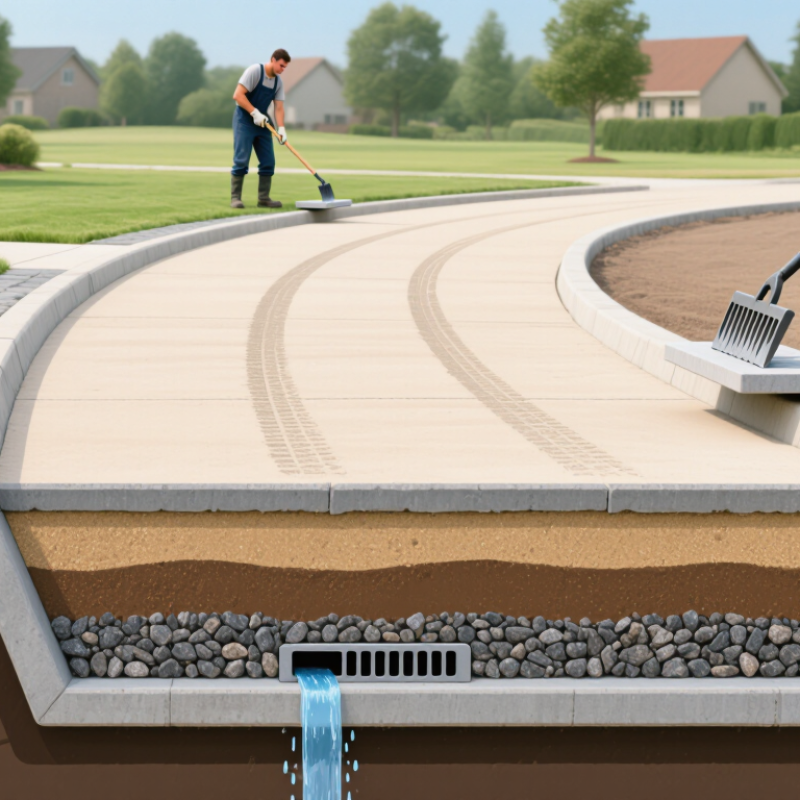
Before choosing a curb paver, define what it must withstand. Will cars cross it, or will it border a garden path? Record turning movements, delivery loads, snow-clearing methods, and the soil’s drainage behavior. A narrow unit may suit a curved planting bed, but repeated wheel contact can loosen poorly supported edges. Check the base and edge restraint, not just the paver’s surface strength. Small details matter.
Drainage can shape the design. The U.S. EPA’s 2003 report, Protecting Water Quality from Urban Runoff, notes that stream quality can decline when watershed impervious cover reaches about 10 percent. That figure is not a site-specific threshold, but it signals why runoff deserves attention. Where water ponds, consider joint width, permeable construction, and a safe discharge route. Permeable paving still needs suitable soil and an engineered base; it is not a cure for every drainage problem.
Match appearance to the surrounding materials, then confirm technical requirements. For projects using interlocking concrete paving units, ASTM C936/C936M specifies an average compressive strength of 8,000 psi. The standard covers paving units, not every curb product, so verify the exact unit classification with the supplier and project documents. Compare color, texture, unit depth, and curve radius against a full-size sample. I have seen color look different in shade. Review it in daylight, too.
Compare Curb Paver Materials, Shapes, and Finishes
Material, shape, and finish should match the curb’s job, not just its color. Concrete pavers offer consistent dimensions and many finishes, while natural stone brings varied texture and color. Brick can add warmth, but its edges and joints need careful installation. The U.S. Geological Survey estimated U.S. crushed-stone production at roughly 1.5 billion tons in 2023, in its 2024 Mineral Commodity Summaries. That figure reflects aggregate’s importance in construction; it does not prove one paver material performs better. Check product specifications and local availability.
Shape affects both appearance and fit. Straight units create crisp borders along paths; tapered or curved units suit rounded beds and driveways. Small details matter. A smooth finish can look refined but may feel slippery when wet, so assess traction where people walk. Textured finishes can improve grip, though dirt may collect in deeper grooves. Compare samples outdoors: sunlight, rain, and nearby paving can shift how colors appear. I’d reconsider any choice based only on a showroom sample.
Tips: Ask for compressive-strength and water-absorption data, and confirm the units meet the relevant ASTM specification. Check edge dimensions against the planned curve before ordering. For vehicle areas, match paver thickness and bedding details to expected loads; a handsome curb can still shift if its base is poorly prepared. A small mock-up helps, though it cannot reproduce years of weathering.
Check Site Conditions and Installation Requirements
Before choosing a curb paver, walk the full route and note changes in slope, drainage, and soil firmness. Measure the curb line, including corners and tight curves. A straight run beside a driveway has different demands from a garden edge that bends around a tree. Watch where rainwater collects after a storm. Water tells you a lot. Soft, shifting soil may need excavation and a compacted base before any pavers are set. On slopes, check whether runoff could wash bedding material from beneath the edge.
Match the paver’s size and shape to the installation area, then confirm the required base depth and edge restraint. A narrow paver may fit curves neatly, but it can require more cutting and careful alignment. Check that the finished height will meet nearby paving without creating a trip point or blocking drainage. For example, use a straight board across the new edge and adjacent path to spot height differences before setting the full run. One detail is easy to miss: existing soil can settle unevenly, even when it feels firm underfoot. A small test excavation can reveal roots, buried debris, or loose fill. If conditions vary, adjust the preparation rather than assuming one base detail will work everywhere.
Choose Curb Pavers for Site Conditions and Traffic Loads
Typical concrete paver thickness guidance is 60 mm for pedestrian areas, 80 mm for vehicular areas, and 100 mm for heavy-duty industrial use. Check the subgrade, drainage, bedding, and base requirements for your site, and confirm specifications against local standards and the paver manufacturer’s guidance.
Compare Costs, Maintenance, and Long-Term Durability
How to Choose the Right Curb Paver for Your Project?
Compare Costs, Maintenance, and Long-Term Durability
A curb paver’s price is only part of its cost. Compare material, delivery, and installation, since a stable base and careful edging require labor. Concrete pavers often offer a lower initial cost, while clay or natural stone may cost more upfront. Local availability can change that balance. Get itemized estimates.
Maintenance depends on the material and the site. Concrete may need occasional sealing, while joints in any paver system can collect weeds or lose sand. Leaves, standing water, and winter salt can leave visible marks. That matters. Ask how the surface should be cleaned and whether replacement units will be easy to match years later.
Durability is not just a product feature. It depends on drainage, soil stability, traffic, and installation quality. A curb beside a driveway faces different stresses than a garden border. Check the manufacturer’s load and climate guidance, and confirm the base depth with a qualified installer. One detail is easy to miss: a small drainage problem can undermine even a durable paver. I’d compare expected upkeep over several years, not just the first invoice; those estimates are imperfect, but they make trade-offs clearer.
How to Choose the Right Curb Paver for Your Project? — Compare Costs, Maintenance, and Long-Term Durability | Curb Paver Type | Typical Installed Cost (USD per Linear Foot) | Maintenance Needs | Typical Service Life | Durability Considerations | Best Suited For |
| Concrete paver units | $12–$30 | Occasional sweeping; replace or reset individual units if they loosen or settle. Joint sand may need replenishing. | About 20–30 years | Strong and readily repairable. Performance depends on a well-compacted base, drainage, and freeze-thaw resistance. | Driveways, walkways, and landscape edges where a consistent appearance and straightforward repairs are priorities. |
| Clay brick pavers | $15–$35 | Periodic sweeping and joint maintenance. Individual bricks can be lifted and reset when needed. | About 25–50 years | Color is generally integral to the fired clay and does not rely on a surface coating. Quality and suitability for freeze-thaw conditions vary by product. | Traditional-style paths, patios, and borders where a warm, established appearance is desired. |
| Natural stone setts | $25–$70 | Usually low routine maintenance; check joints and reset stones if movement occurs. Sealing is optional and depends on stone type and desired appearance. | About 50 years or longer with suitable stone and installation | Highly durable, but strength, porosity, and resistance to weathering differ among stone types. Heavier units require a stable base. | High-traffic areas, long-lasting landscape borders, and projects where natural variation is valued. |
| Precast concrete curb units | $10–$28 | Minimal routine care. Inspect joints and alignment; damaged units can often be replaced individually. | About 20–40 years | Provides a defined edge and can resist everyday impacts. Cracking or movement may occur if the bedding, drainage, or installation is inadequate. | Garden edges, parking areas, and projects needing a clear, uniform boundary. |
| Poured concrete curb | $8–$25 | Occasional cleaning; cracks may need sealing or patching. Repairs can be more visible than replacing a single paver. | About 20–30 years | Creates a continuous edge with few joints, but shrinkage, settlement, and freeze-thaw exposure can cause cracking. | Long, continuous borders where a clean, uninterrupted edge is preferred. |
| Cost and service-life figures are broad U.S. planning estimates, not guarantees. Actual costs vary by region, access, excavation, base preparation, drainage, project size, and labor. Proper installation and local climate conditions strongly affect durability. |